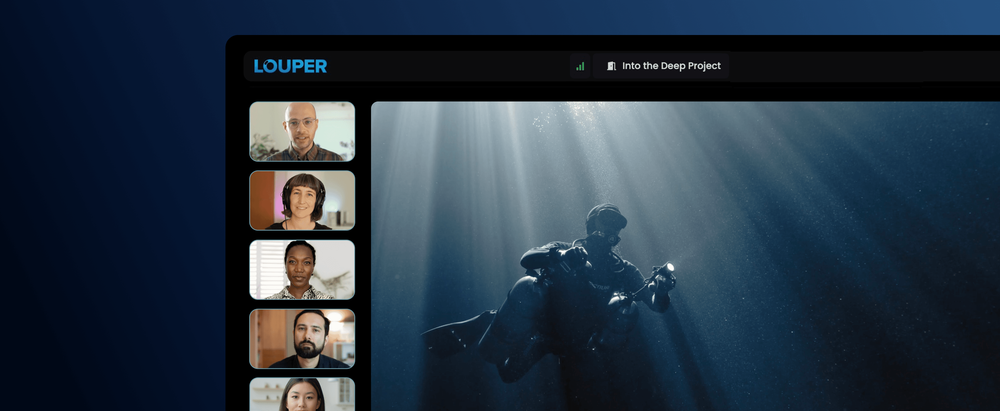
How to Livestream from Premiere Pro, Avid Media Composer and DaVinci Resolve
How to Livestream from Premiere Pro, Avid Media Composer and DaVinci Resolve
If you need to stream your edit timeline and host live remote sessions, do it with Louper.
Edit together, faster
With more creatives working remotely, editors are increasingly expected to host remote or hybrid edit sessions. Louper provides an easy and cost-effective solution for teams looking to stream their edit reviews to collaborators for live feedback, review and approval.
What is the best way to stream a remote edit session?
If you need to livestream your edit reviews, there are several ways to do it. Louper supports NDI workflows, native plugin streaming, SDI/HDMI signal loops, and hardware encoder workflows, making it easy to host remote edit sessions, review cuts with clients, and collaborate with creative teams in real time. Read on for a breakdown of streaming setups for Premiere Pro, Avid Media Composer, and DaVinci Resolve, and see which workflow is best for your specific setup.
| Edit Software | Streaming Method | Best for |
|---|---|---|
| Adobe Premiere Pro | Louper Transmit | Fastest set up, simple UI |
| Adobe Premiere Pro | NDI + LDE | Advanced settings, robust streaming, logs, multiple scenes |
| Adobe Premiere Pro | SDI/ HDMI loop + LDE | Blackmagic hardware workflows, logs, multiple scenes |
| Avid Media Composer | Louper Transmit | Fastest set up, simple UI (limited to Mac) |
| Avid Media Composer | NDI + LDE | Advanced settings, robust streaming, logs, multiple scenes |
| Avid Media Composer | SDI/ HDMI loop + LDE | Blackmagic hardware workflows, logs |
| DaVinci Resolve | SDI/ HDMI loop + LDE | Blackmagic hardware workflows, color workflows, logs |
| DaVinci Resolve | Nobe Display NDI + LDE | Hardware-free streaming, NDI workflow, logs |
| DaVinci Resolve | Screen Capture + LDE | Simplest setup, editorial workflows, logs |
How to livestream from Premiere Pro
There are a number of ways to stream your edit from Premiere Pro:
- Stream out of Premiere with the Louper Transmit plugin
- Stream an NDI feed out of Premiere with our desktop encoder, LDE
- Stream an SDI / HDMI signal loop from Premiere using Blackmagic Hardware
1. Stream from Premiere with the Louper Transmit plugin
Louper Transmit is a great option for seamless streaming. The plugin sits within your Premiere Pro user interface, and allows you to start and stop the stream without needing to jump to a separate window. It has three streaming functions: Auto (streaming full screen output during playback, and the Premiere GUI when playback is paused), Program (streaming the full screen output only) and GUI (streaming the Premiere GUI only). Setup is simple: just download the plugin, open it up in Premiere, and set your playback settings to send audio and video to Louper Transmit. Paste your Room's unique streamkey into Louper Transmit, and start streaming! See our full setup guide for Louper Transmit here.
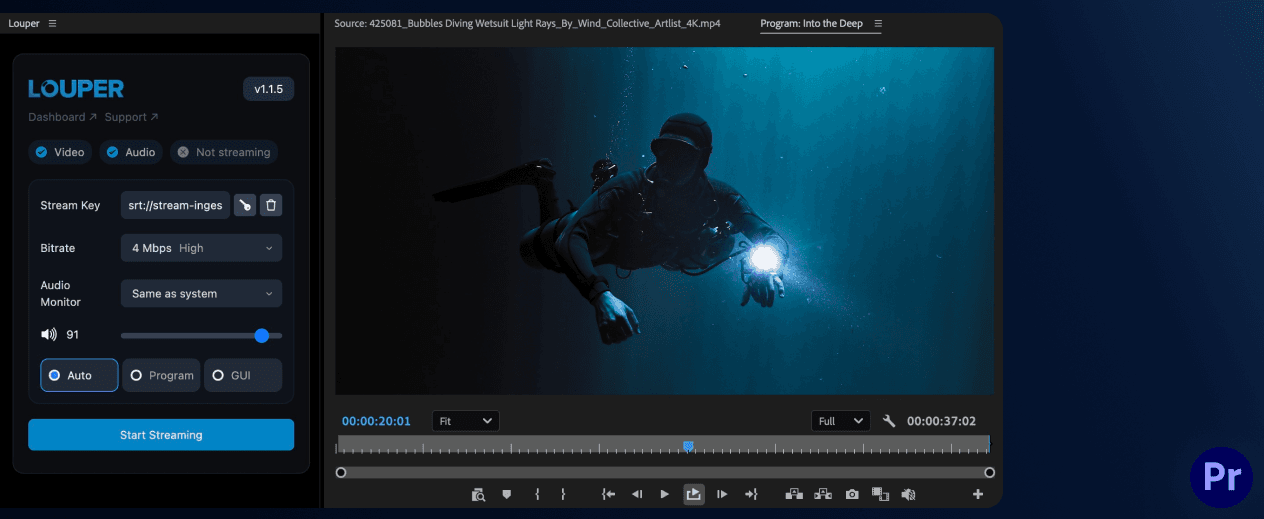
2. Stream an NDI feed from Premiere Pro with LDE
Premiere Pro natively supports output to NDI, which can be picked up by Louper's desktop encoder, LDE and streamed to your Louper Room. LDE is a robust streaming encoder, that allows multiple scenes to be set up, so you can seamlessly switch between your full-screen NDI output from Premiere, a screen capture of your Premiere GUI, as well as feeds from other software (like Pro Tools or After Effects). See our full setup guide for an NDI and LDE workflow for Premiere.
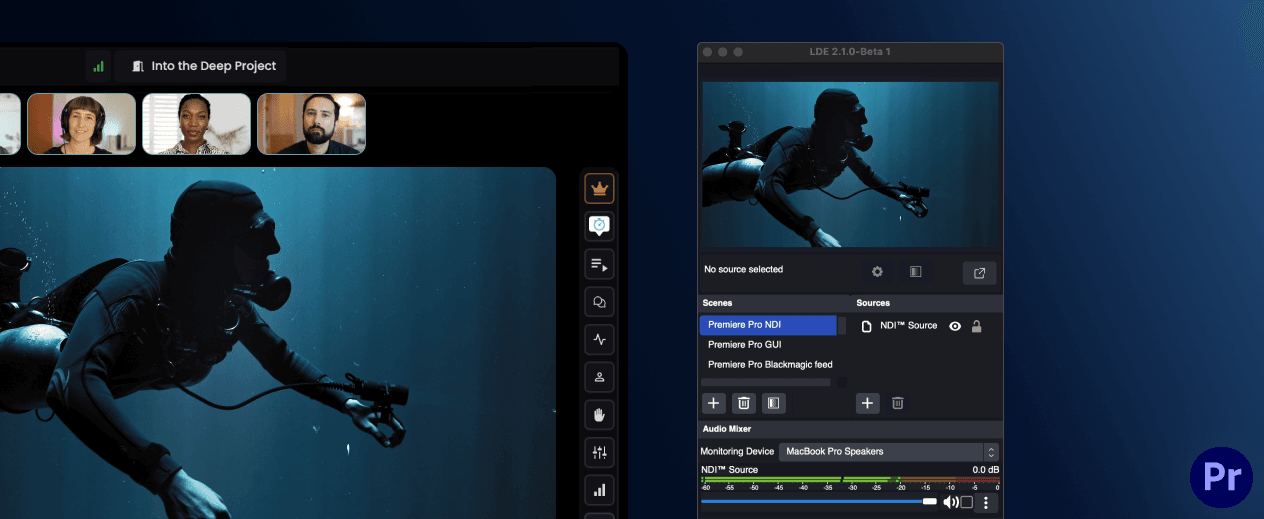
3. Stream an SDI / HDMI signal loop from Premiere Pro with LDE
If you require your Premiere output to go through a local Blackmagic hardware setup, you could set up an SDI or HDMI signal loop from that hardware, and stream the signal to your Louper Room using LDE. This workflow allows you to hear audio locally through your hardware setup, while streaming audio into the Louper Room. See our full setup guide for an SDI/ HDMI signal loop workflow from Premiere.
How to livestream from Avid Media Composer
With Louper, you can stream your output from Avid in a number of ways:
- Stream directly out of Avid with our native plugin, Louper Transmit
- Stream an NDI feed out of Avid with our desktop encoder, LDE
- Stream an SDI / HDMI signal loop using Blackmagic Hardware.
1. Stream from Avid Media Composer with Louper Transmit (Mac only)
The Louper Transmit plugin sits as a panel within your Avid layout, meaning you can set up and run your stream without leaving the Avid user interface. It has three streaming functions: Auto (streaming full screen output during playback, and the Avid GUI when playback is paused), Program (streaming the full screen output only) and GUI (streaming the Avid GUI only). Setup is simple: just download the plugin, open it up in Avid, and adjust your HW/SW settings to send your output to Louper. Paste your Room's unique streamkey into Louper Transmit, and start streaming! See our full setup guide for streaming from Premiere Pro with Louper Transmit here.
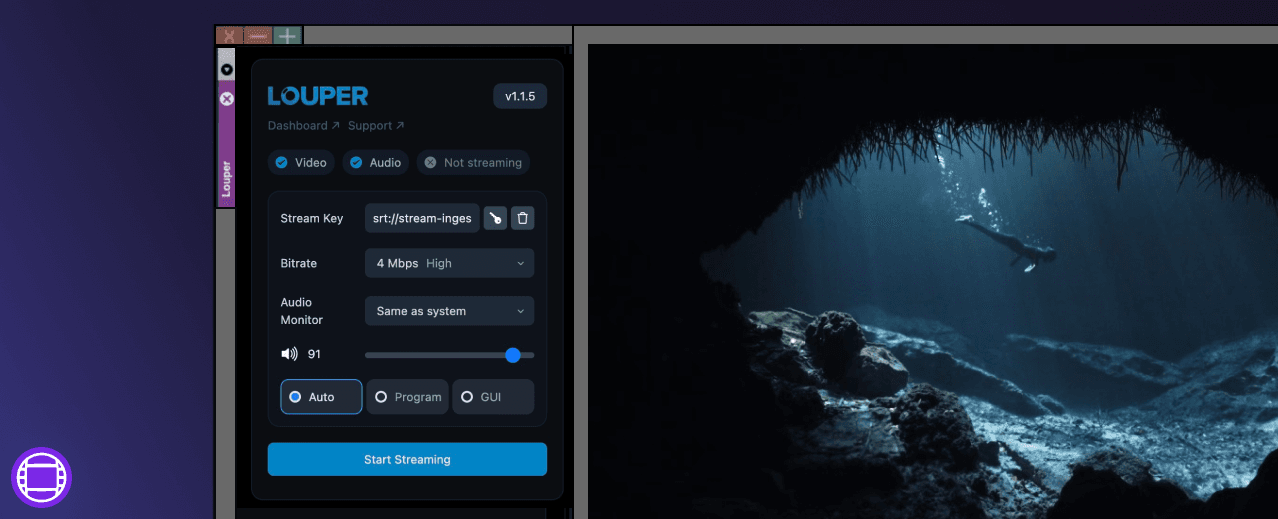
2. Stream an NDI feed from Avid with LDE
Avid Media Composer natively supports output to NDI, which can be picked up by Louper's desktop encoder, LDE and streamed to your Louper Room. LDE is a robust streaming encoder, that allows multiple scenes to be set up, so you can seamlessly switch between your full-screen NDI output from Avid, a screen capture of your Avid GUI, as well as feeds from other software (like Pro Tools). See our full setup guide for an NDI and LDE workflow for Avid Media Composer.
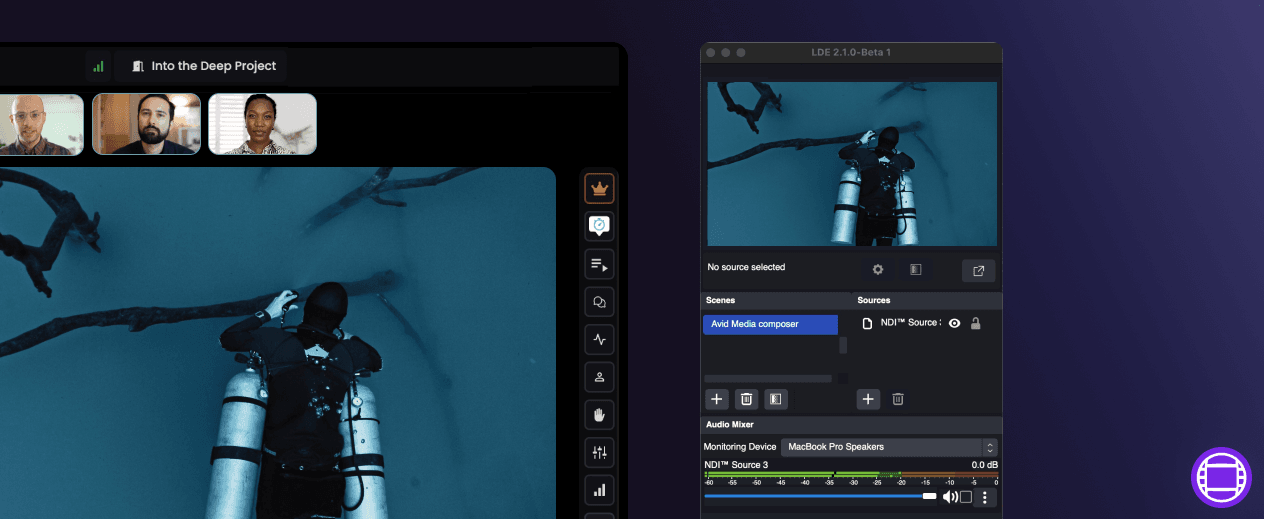
3. Stream an SDI / HDMI signal loop from Avid with LDE
If your Avid output is already set up for local monitoring via Blackmagic hardware, you might prefer to set up an SDI or HDMI signal loop from that hardware, and stream that signal to your Louper Room using LDE. See our full setup guide for an SDI/ HDMI signal loop workflow.
How to livestream from DaVinci Resolve
For editorial workflows in Resolve, there are a few setups you could look at:
- Stream an SDI / HDMI signal loop from Resolve using Blackmagic Hardware
- Stream an NDI feed out of Resolve using Nobe Display and LDE
- Stream a Screen Capture from Resolve (not recommended for color workflows)
1. Stream your Resolve feed as an SDI / HDMI signal loop using Blackmagic Hardware
This setup is a robust solution for streaming color or editorial workflows out of DaVinci Resolve. If your Blackmagic hardware setup has enough ports to make a loop, you can pick up and stream that signal with LDE, Louper’s Desktop Encoder. See the full setup guide for streaming an SDI or HDMI signal loop from Resolve.
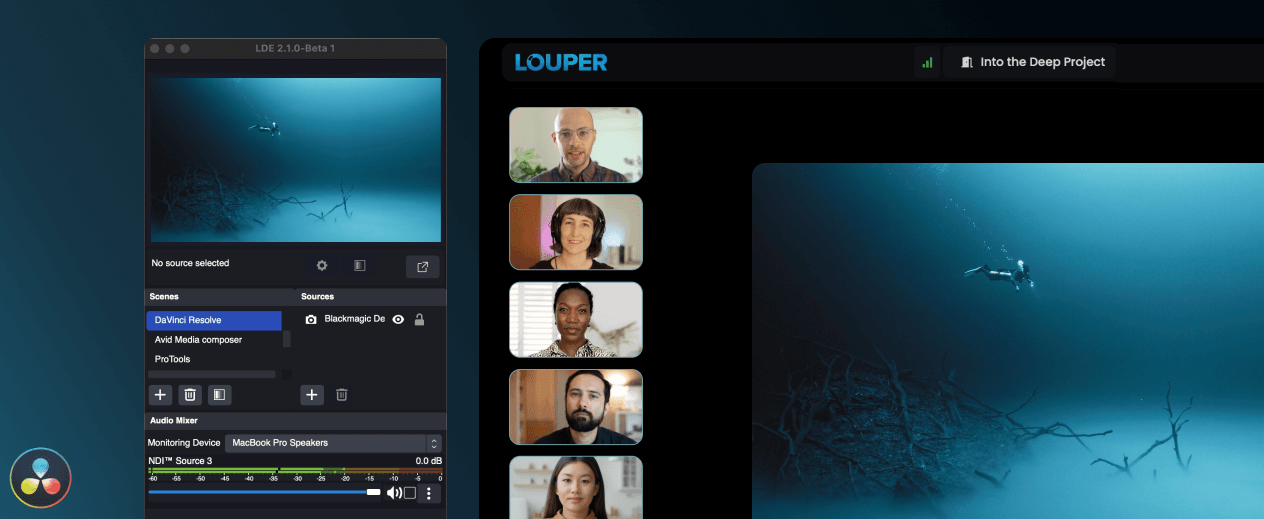
2. Stream an NDI signal out of Resolve using Nobe Display or Nobe Omniscopes
DaVinci Resolve does not natively support an NDI output, however there are third-party apps that can generate an NDI feed from Resolve. You can then pick up and stream this NDI feed with LDE. This guide is a good option if you do not have access to hardware, or if you are already using Nobe Display or Nobe Omniscopes in your workflow. Note that the NDI feed from Nobe Display does not support audio, so you would need to add a ‘Desktop Audio Capture’ source from Resolve in your LDE scene for editorial workflows. See the full setup guide for streaming an NDI feed via Nobe Display here.
3. Stream a Screen Capture of your Resolve output with LDE
For editorial workflows, you can set up a scene in LDE comprising of a ‘Screen Capture’ of your Resolve video output, and a ‘Desktop Audio capture’ of your audio output. This feed can then be streamed to your Louper Room. See the full setup guide for streaming a screen capture from DaVinci Resolve.
Which streaming workflow should you choose for remote review sessions?
The best streaming setup depends on your current workflow, and how your suite is currently configured. Plugin-based streaming for Premiere and Avid is the simplest setup; NDI with LDE is a robust and flexible solution, giving you the most control over your settings, scenes and sources; while an SDI / HDMI hardware workflow provides high reliability and image accuracy for color, VFX and sound workflows.
Whether you're reviewing cuts with clients, collaborating with directors, or running editorial sessions across multiple locations, Louper makes it easy to stream your edit timeline and gather feedback in real time.
Louper vs Evercast, Sohonet ClearView Flex, DaVinci Remote Monitor, Frame.io and Zoom
Streaming with Louper is more cost effective than Evercast or Sohonet's ClearView Flex, and Louper’s self-serve plans are flexible and modular - meaning they can start out small, and grow with your team. Unlike some of the Colorfront and ClearView Flex workflows, Louper doesn’t require dedicated streaming hardware on the streamer or the receiver end. And unlike DaVinci's Remote Monitor, guests don’t need to download anything or sign up for an account - they can join a Louper Room right from their browser, with just a click.
Why choose Louper?
Louper is also the only post-production platform that offers both livestreaming and async file review in one place. Apart from hosting a livestream in your Louper Room, you can also upload files to your Louper account, share those in Review Links for feedback or download, and add them to Rooms to discuss feedback and add comments or annotations together. Switching to Louper can replace three remote collaboration tools in one: a conferencing app like Zoom, a streaming app like Evercast, and a file review platform like Frame.io.
Getting started on Louper is easy! Sign up for a free account and receive a 10-day trial of our Studio plan, no credit card required.

Use Louper to stream and collaborate on live shoots, edit sessions, vfx reviews and more - securely and in seriously high quality.

